Zenith A600 Transoceanic Restoration
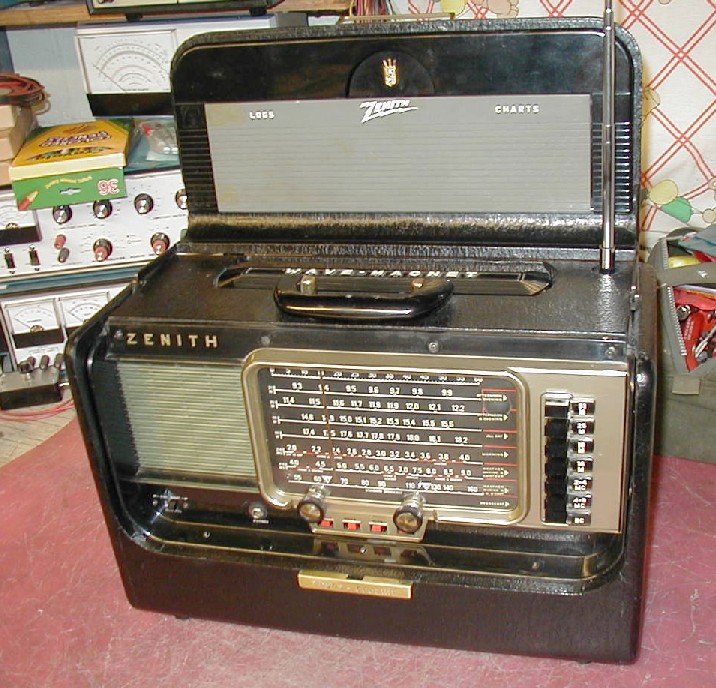
| Picked this up on ebay early 2006. Boy is this a beautiful radio. Both in looks and in operation. It's no wonder it has a name that still has recognition today. I got this one off ebay too. I did not tear this one down to a bare chassis but I did replace all the carbon comp resistors with 2% metal film and replaced all caps both electrolytic and non-electrolytic. I did not replace the caps in the RF section though. I've learned that it is best to leave the originals in as much as possible when working with the RF sections. New doesn't necessarily make things better when dealing with the RF sections of these old radios. I am convinced that it is because the deficiencies of the components of the time were engineered into the radio. Putting newer, better, parts in these sections sometimes makes it work not so good, or at the ends of the engineered ranges of the circuits. In other words they figured in the deficiencies of the day into the circuit and they work best with the original components. |
.JPG) |
.JPG) |
.JPG) |
| This radio was in very good shape when I received it. These are a couple shots of the front and rear of the chassis removed from the case. All I really did on this side of the chassis was clean it up and put new tubes in it. | ||
.JPG) |
Here's the underside. This is where most of the work occurred. As you can see I replaced all the resistors and caps. Did a little rewiring with newer wire. Also added a dropping resistor that could be jumper'd across the 50A1 ballast tube if it went bad and I needed to get it working. The ballast was blown when I got the radio and I did get a replacement. I replaced that nasty selenium rectifier with a 1N400x diode. I was able to find a very good replacement for the can electrolytic, dropped right in. The new can was short one of the capacitors and I had to add that as a separate lytic wired under the chassis. I did not mess with the push button and coil section on the side of the chassis. It was working well so I left it alone. |
|
|
.JPG) |
|
Here she is finished, about June 2004. I used shoe polish on the case and it came out beautiful and shiny. Very impressive looking. Note the battery in the pic on the right. This is an after market thing that uses modern 9v batteries (10 of them to make 90 volts) and 1.5 Volt D batteries for the filaments. Works very well. It aligned up very nicely and I am just amazed at the sensitivity it has. From my basement in the Midwest (just north of Chicago) and on only the extended whip I regularly pick up WBCQ out of Monticello Maine on 7415KHz. It sounds really good for only being a single ended 3V4 output. I see why this was "The Radio" of the day. I removed the spring from the panel lamp switch (tucked it away so it could be put back on and made original). I liked sitting on the back porch on summer nights in the dark seeing what I could pick up and it sucked having to hold that spring loaded switch on to light the dial. I like it better sitting there lit in the dark anyway, so off the spring went. One other noteworthy thing. When I removed the chassis it appeared there was a thin sheet of what looked like asbestos in it. I'm sure if this was to provide some type of heat or battery byproducts barrier. At least it looked asbestos to me. A search through many pictures of other Oceanic's showed it appears quite often, certainly this was back in a time when asbestos dangers were not known yet. Anyway, I didn't want to take any chances, I took it outside and removed it right over the garbage can into a plastic bag and carefully made sure it was all cleaned out of the radio. |
|