%20Small.JPG) |
%20Small.JPG) |
%20Small.JPG) |
|
This is how I got it. Front panel was in good shape and underside was in
pretty good shape. But the top was a disaster. Rusted real bad. It was
going to be a lot of work to clean that up and I didn't really even know
if I could completely clean up. It came out pretty good though in the
end. |
|
 |
%20Small.JPG) |
%20Small.JPG) |
|
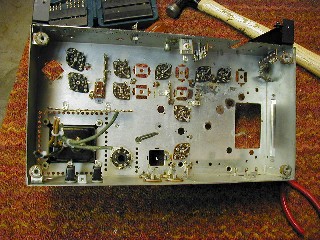
I did strip it down to a bare chassis. Here it is almost all the way
dis-assembled. I did remove everything. |
Here's some pics of re-assembly. Looking pretty good. I replaced all the
wafer tube sockets with porcelain sockets. I did also strip down and
rebuild the RF section as well. |
|
%20Small.JPG) |
%20Small.JPG) |
%20Small.JPG) |
|
Here it is about finished. Had to wire brush the chassis to get the rust
off. You can still see the area that was very rusted, but it looks
pretty good. I repainted the transformers and put new tube shields on.
Replaced all the resistors and caps. It's ready for alignment and
operation check. |
|
%20Small.JPG) |
%20Small.JPG) |
%20Small.JPG) |
|
Here it is finished. Front panel on. It aligned up very well. RF section
is a little touchy during alignment because it did require spreading and
compressing one of the coils in the RF as part of the alignment. But
patience won out. It works very well. Now all I need is an amp to go
with it. |
|